Showing posts with label craft ideas for pen pals. Show all posts

Monday, April 6, 2015

Write on Challenge

Just so you don't get all confused, this blog hasn't gone back in time to Valentine's day. I am cutting a bunch of hearts to sew together, but they are for a different matter.

What matter is that? you ask.

Well, a few days ago I read on Instagram about a challenge to write 30 letters in 30 days, and I was, WHAT!!!! I need to do that, but where will I get 30 people to write to.

Instagram and Facebook of course. I asked who wanted to receive a letter from me, and almost 30 people answered.

As you may or may not know April is National Letter Writing month. You can read all about the campaign here, and I think there is still time to order your free kit to get you started. They also recently started a lovely blog filled with wonderful inspiration in all things related to the art of letter writing.

Maybe you'll feel the need to send 30 letters out, or maybe just one or five. Any number is perfectly wonderful. Just a tiny grain to keep the art alive, is enough.

Confession: I'm actually not writing a letter per day. I have written more than one per day, but I have plenty of good excuses, for instance; I work from our dining table, and it can't possibly be a mess for a month, when I write letters, I also make things to send, like the garlands above, I do take my time to write, and decorate the envelope, and finally I have kids on vacation at the moment.

So, there will be days when  I'll write 1 or 3 letters and there will be days when I won't be able to write anything at all.

I do hope you find a little time this month to send out a letter. If you need ideas on what to include with your letter, you can check out The Flat Project.

All the best,
Giova

Thursday, February 5, 2015

Mini Buntings for Valentine's day

At one point I had the intention of doing last years heart project again. Who knows where the time went? Did you know it was already february? I just realized it two days ago, when I received the most amazing Valentine's package. I'm still blown away by how beautiful and kind people are, so Julia if you are reading this, thank you so, so much! I am deeply touched by your thoughtful gift.

That package (you can see it at the end of this page), made me realize I have done nothing for my favorite holiday of all. I also realized that I haven't done many normal buntings (triangular ones), for the blog, and so I thought "now is the time."  You can read last year's Valentine's day manifesto here or take a look at the heart project here.


I made these little buntings in no time, so if you haven't done anything (like me), maybe this is the perfect craft for you.

As it is pretty straight forward I'll skip the instructions. But I do have one tip; fold the paper and then cut the triangles, don't cut 2 triangles and then paste, believe me, it is much easier the other way.


What I've used:

  • old paper (from an old book I got in France)
  • glue stick
  • glitter (mine is this one)
  • glue for glitter (I used this one)
  • twine (I used this one)
  • alphabet rubber stamps  (I've had mine for a really long time, but they have similar here)
  • blank cards


I had to show you a fabric version as well. Tiny diamond shapes sewn together. They measure more or less 3 cms each. Obviously the paper ones are quicker, but these ones take just 10 more minutes to make.

Gather some blank cards in your preferred color and simply tie the bunting around it. This way you'll be sending a greeting with a little handmade gift.

Lately time passes through me so quickly that an entire month just goes away without me realizing that it did. I do hope that my Valentine's greeting reach their destination, if not by the 14th at least in February.

And this is the beautiful package that found it's way to my mailbox!

I wish you a lovely weekend ahead, filled with hearts, and all things crafty!
And if by any chance you want to see this movie thinking it will be a romantic one, as it says on the description, please don't. There is nothing romantic about it. Serves me well for not reading the whole synopsis.
Giova

Monday, March 31, 2014

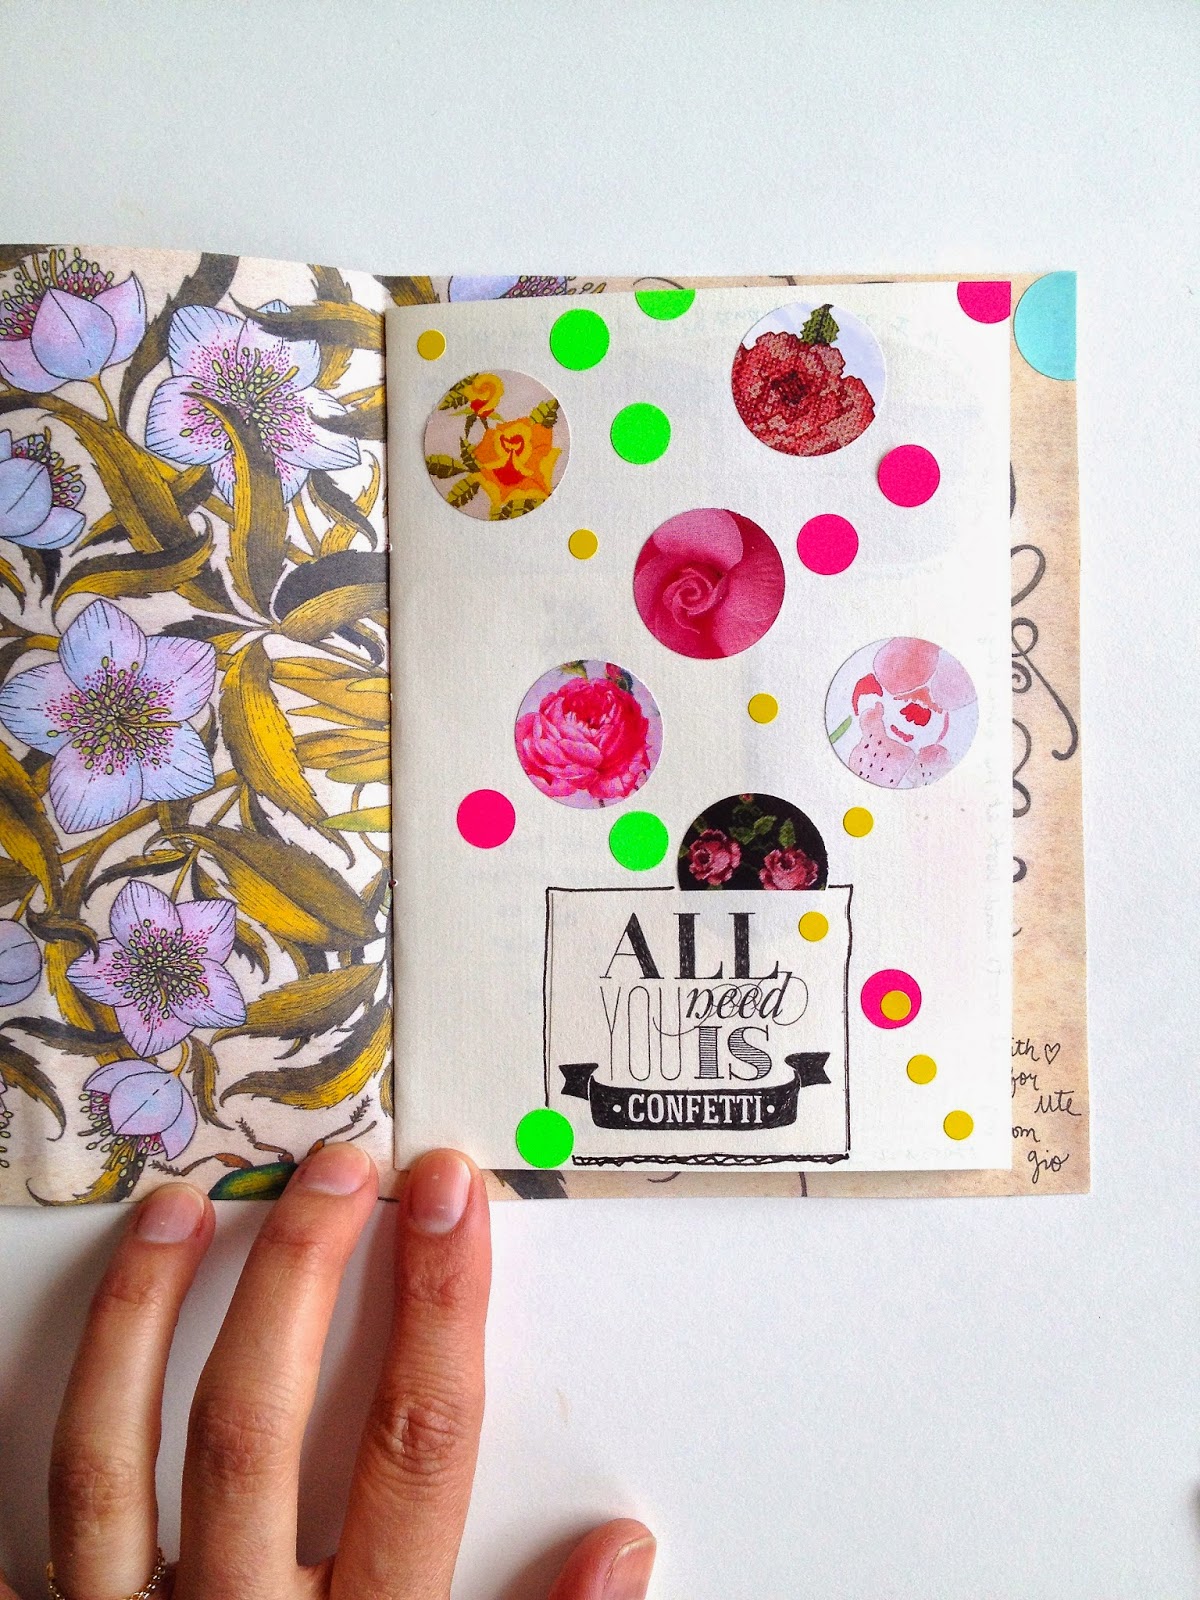
A handmade quote book

This week it is my sister's art show opening. I was supposed to be there in our hometown for this event, but unfortunately  I wasn't able to make it. So with my guilty feelings and the fact that I wanted to make it up and also reassure her that everything would turn out great, I decided to make her a little book.


For some reason (I don't know which), I was not going to show this little book here on the blog (so excuse the really poor quality of the pictures). Since I made this book for her, I have started making others, and found them quite addictive, that is why I decided to share them with you. 

All you need is love and well... paper, glue, and scissors, and a needle and thread to tie the whole thing together.  The quotes I found on Flow magazine, but you can just write them yourself.

For my sister's book I used mostly encouraging quotes, or ones that had to do with artists. And of course a picture of my kids (that was a no brainer).

 Just make it personal, and I'm sure the recipient will be as happy as you making it.

You can add as many pages as you like, mine are 2 pages folded, which makes 8 pages to decorate, which I found was the perfect amount. 

I hope you are inspired by this idea and decide to make some of your own.

The video from the top comes from my instagram, if you like to take a better look.

Have a great start of the week.
Giova

Monday, February 24, 2014

Handmade and small gifts for pen pals

"Spring is approaching," is my new mantra. I repeat this in my head all day long. In fact I've been thinking about it since the beginning of January which makes me a bit, how do I say this? Annoyed? I'm supposed to be in the present, the now, enjoying what I got right at this second and I'm dreaming of a beach, a hammock and lots of sun. Oh! I've just realized that it is summer what I'm dreaming about.

Anyway, here are some ideas to cheer someone up via snail mail. The most important thing is that it's flat! I haven't had the chance to complain here about the raise of postal prices (boy are they ridiculous!).  The fact that a simple package is starting at 9 euros makes me think twice before I send anything out.

So in January (I know...) I came up with some little boxes to send. This one is filled with airmail labels that I printed here. But some stores like this one, sell vintage ones.

You can also make little pouches to fill with your favorite seeds, carve a stamp, make a label and close with your favorite washi-tape. Spring is approaching, spring is approaching...

Send them in a small tin box. Don't forget to include the instructions for planting.

Why not carve a few tiny rubber stamps to fill a pill box? As you can see I was still in heart and Valentine's mode.

Send to friends, pen pals, any one really. Snail mail has the ability of cheering everyone up, and with this winter going on, wouldn't it be nice to open a package that has been sent with lots of love? I think it would!

The things you could fit in a small box are a lot. Just give it a try. Did I mention cheer someone up?

Happy monday. I hope it is a good one!
Giova

Wednesday, October 16, 2013

DIY - Make Coasters With Fall Leaves

I was seriously thinking about not doing any crafts with leaves. Guess what? I just couldn't keep myself from not doing one.

I mean, have you looked out of your window and seen all those amazing leaves just turning bright and making a beautiful mess of yellow? My sister would probably answer no to this question, but she does live in Miami after all.


I went in a fabric store this past monday and when I saw this wool/tweed stuff, I thought; "Wouldn't that make a nice leaf?"


This is what you'll need:

  • fabric for the leaves, for the front and back part
  • thin felt for the middle
  • leaves that you've picked up on your walks, they are free!!
  • thread, needle, pins, scissors
  • pencil and paper
Trace your chosen leaf. Cut the template. Pin it to your fabric of choice. Cut the leaf, and stitch to the top fabric.

Cut the felt and back fabric to fit your front. Iron the back fabric to cover the felt, and then stitch the coaster using any stitch you like. I used the blanket stitch and back stitch. For really amazing sources on stitches go here or here.

Then just marvel at your hard work (ahem!) and don't forget to include one on your next letter to your pen pal. Maybe add a tea bag or two?

Or maybe just give them all to a friend who invited you to their house for dinner? OK, you get my drift. Just make some and give it away, because handmade presents are the best, don't you agree?

Have a great day and as Dottie Angel says;"Do feel a little crafty at least twice a day."
Giova

Friday, August 23, 2013

A String of Shells

We have been back in Holland for more than 2 weeks already, and every time we see the sun shinning (which is not very often), we jump in the car and go to the not very popular beach.

One of my favorite pastimes is gathering shells, and then putting them on a strings (I love strings of things). A very easy craft and one that I'm sure your recipient would love. I'm not including this in my flat project as it exceeds the dimensions. But it is something I would definitely include in a package for a pen pal.

What you'll need:

  • shells - especially watch out for the ones with holes otherwise this won't be an easy craft
  • thread in your favorite color, and needle
  • tassels, pieces of fabric, anything that you want to add to your string
  • origami paper for the box

Then just string the shells how you want them. Adding pieces of fabric, or beads along the way. I always start mine from the bottom part.

Have fun putting it together. There is really no right way or wrong way to do this.

I really think that this string makes for a really nice gift. Or at least it is something that I would love to receive.

Then make a little "Masu" box with your origami paper. This box was made by my son, and he used the scissors for a part, which I'm almost certain in origami you don't use them. You can find instructions here and here.

I hope you will be inspired to make your own little string, and to share with friends the nice shells you picked this summer.

The shells I pick usually go in a small glass bottle with a label of the name of the beach. How do you keep your shells or the things you gather from nature? Is there a especial way you keep them?

Have a wonderful weekend and if you go to a beach keep this string in mind!
Giova.

PS: I leave today for Copenhaguen (haven't been there since I was 18). I'm helping with a project, and they were willing to pay for my travel expenses (so if you know me, you know I can't keep myself out of an airplane for too long). I hope to instagram the bejesus out of that amazing city.

Monday, June 17, 2013

Washi-Tape Alphabet

The idea for this post started a month ago, before my trip to Berlin. It was only meant to be a P and an H. Then 2 weeks ago I thought; "wouldn't it be nice a whole washi-tape alphabet?" It ended up looking pretty nice (or so I thought), but then something happened, something that occurs in the immensity or smallness of our world. This past week I saw that Creature Comforts had made something very similar, and I went gulp, and also said some words in the vicinity of "holy cannoli!!"
Hers (like all the things she does) is beautiful, has a downloadable alphabet and they are stickers (why didn't I come up with that idea?).
In any case, I was thinking of what to put inside an envelope to send to my pen pal, and this is how this very brilliant idea, never done before in the world of washi-tape (add very cynic tone here), was born.


This is what you'll need:


  • A favorite font printed (this is arial bold, 300 size)
  • cardboard
  • scissors or X-acto knife
  • all the washi-tape you can find


  • Cover the letters with the washi-tape, and then simply cut the excess tape. I recommend just doing the letter you want, as the whole alphabet (I mean there are 26 letters, that is like a lot of time and lots of washi-tape, believe me).


    Beware, washi-tape can be very addictive. You have been warned!!

    Here are a few ideas of what to do with all those letters. Before sending your friend her initial, write all the words you come up with that start with that letter (I know a bit childish, but we pen pals like all childish stuff, or maybe it is just me?). As a bookmark, for your mood board, or for the wall, where my G is now looking all good and great!!

    Have a most excellent monday, if it is turning a bit blah, just take out the washi-tape and have fun!

    Giova.

    Friday, May 3, 2013

    Guest Post: Jillian in Italy


     I'm super happy to have Jillian from Jillian in Italy and her colorful world on the blog today. I'm an avid follower of her blog (and not only because we've been blogging friends) but because she is such an inspiration. She is a busy mother of 3, and always comes up with the most amazing projects or the best tips for traveling with kids. I'm really honored to have her here!

    Hello One Bunting Away readers!  I’m so happy to have been invited to share this space today.  I’ve been a huge fan of this blog since I met Giova at The Hive last year and I adore her passion for everything crafty and creative (we’re definitely kindred spirits).  And I love Giova’s infectious enthusiasm for anything to do with the old art of snail-mailing (can it be considered an old art yet?).  I’ve received snail-mail from her and, believe me, it’s amazing.  She puts so much time and thought into her letters that leave you feeling so happy and positive.

    So when Giova asked me to do a little guest post the first thing I thought about was to try and find something for her FlatProject (for snail mailing).  And since I’m a lover of sewing and fabrics it only made sense to combine the two.  I decided to make my own notecards embellished with sewn on pieces of fabric.  It’s quick and easy and actually a great project to do with kids of just about any age.

    This is the perfect project to use up some of those tiny pieces of scrap fabric that you’ve been saving for the last decade (please tell me I’m not the only one who does this).


    I cut up tiny circles, half circles and triangles and sewed them around the edges of various sized pieces of coloured cardboard.  I used a mix of floral, polka dot, gingham and striped materials but it would also be really nice with solid fabrics as well.  And don’t worry about them being perfect – the homemade look makes these little cards even more charming.

    My daughters and I also made some round cards which turned out very sweet.  Definitely something a little different to include in your snail mail envelope. 


    Since I know Giova loves inspiring quotes I dug out my jar of alphabet stamps and stamped some out on a few of the cards.


    Whether you use these as writing cards or frames for your favorite inspiring words I think they would bring a lot of joy and colour to any letter you send to friends, family or pen pals.  Thanks for having me Giova!


    I hope you have enjoyed her really cool ideas for making your snail mail a bit prettier and colorful. For more doses of color, sewing projects, baking goodies make sure to visit her blog.
    Thank you so much Jillian! And do send a pretty card this way, I would love to have one!!

    Have a great weekend!
    Giova

    Related Posts Plugin for WordPress, Blogger...