Showing posts with label tuck-ins. Show all posts

Friday, August 23, 2013

A String of Shells

We have been back in Holland for more than 2 weeks already, and every time we see the sun shinning (which is not very often), we jump in the car and go to the not very popular beach.

One of my favorite pastimes is gathering shells, and then putting them on a strings (I love strings of things). A very easy craft and one that I'm sure your recipient would love. I'm not including this in my flat project as it exceeds the dimensions. But it is something I would definitely include in a package for a pen pal.

What you'll need:

  • shells - especially watch out for the ones with holes otherwise this won't be an easy craft
  • thread in your favorite color, and needle
  • tassels, pieces of fabric, anything that you want to add to your string
  • origami paper for the box

Then just string the shells how you want them. Adding pieces of fabric, or beads along the way. I always start mine from the bottom part.

Have fun putting it together. There is really no right way or wrong way to do this.

I really think that this string makes for a really nice gift. Or at least it is something that I would love to receive.

Then make a little "Masu" box with your origami paper. This box was made by my son, and he used the scissors for a part, which I'm almost certain in origami you don't use them. You can find instructions here and here.

I hope you will be inspired to make your own little string, and to share with friends the nice shells you picked this summer.

The shells I pick usually go in a small glass bottle with a label of the name of the beach. How do you keep your shells or the things you gather from nature? Is there a especial way you keep them?

Have a wonderful weekend and if you go to a beach keep this string in mind!
Giova.

PS: I leave today for Copenhaguen (haven't been there since I was 18). I'm helping with a project, and they were willing to pay for my travel expenses (so if you know me, you know I can't keep myself out of an airplane for too long). I hope to instagram the bejesus out of that amazing city.

Monday, May 20, 2013

A String of Joy

Obviously it is inspired by Dottie Angel and her "have a heart" string (which can be found in her book), but in my case what brings me joy is paper, mail, and stamps. And what a better thing than to have all of them together in another of my favorite things, a garland!
   
           
      GATHER: (basically what you heart desires, but this is what I got)

  • all the nice scraps of paper you have lying around
  • stickers
  • stamps
  • squeeze punch scalloped circle from Fiskars
  • hole punch from Martha Stewart


I've sewn mine (which is what I do with everything lately), but you can just get a long piece of thread and attach the stamps to the scalloped rounds with either glue, washi-tape or stickers.
Oh, and don't forget to decorate both sides if your sending it to your pen pal (you don't know where it will hang so better to have both sides covered)!!

Have a happy Monday, and don't forget to enter the GIVEAWAY full of snail mail goodies, plus if you don't end up a winner I will send you a handwritten letter (I promise)!!!

Giova.

Monday, April 1, 2013

Another Type of Envelope

Hoping you had a most excellent Easter surrounded by family, and as Jillian says; with lots and lots of chocolate!!
Here is a little craft I want to leave you with, before our break. This won't take too much of your time, except the letter (of course).

This envelope or  folder or holder, I still don't know its name exactly, fits perfectly in a 23 x 16 cms envelope. It does have to go in another envelope otherwise it won't make it in one piece, (redundant, I know) but I'm pretty sure your pen pal will love it so much!

You will need:
  • A doily cut in half (for the upper and lower flaps)
  • A piece of thick paper measuring 21 x 14 cms
  • 2 pieces of paper (for the right and left flaps) measuring 21 x 7 cms each
  • Extra pieces of paper for the inside pouches
  • and washi-tape 


Envelope closed

When you open the" holder of things" you will find; a letter, tea, and a quote.


The left side holds the tea, the right side the quote, plus the date (very important for us pen pals)

This is how the back looks. Not too much decoration, but you're welcome to.

The doily is from Talking Tables, the bird paper used for the envelope is from Sukie, and the one for the letter is from Uguisu, one of my favorite web stores!!

We'll be back in a week or maybe two. My older one will be on vacation for 15 days (yes 15!!), and we are trying to figure out, how to best entertain a 2 year old and an 11 year old together. Quite, quite difficult sometimes.

Wishing you much creativity and craftiness!!
Giova

Friday, March 22, 2013

Sending Poems

The first book my husband ever gave me was one with the poems of Keats, and my grandfather would print out his favorites poems whenever he knew I was going to visit. Needless to say, I love poetry. I loved Walt Whitman, and Pablo Neruda in high school. Then fell in love completely with Mario Benedetti, a love that still continues to this day. Then E.E. Cummings, Wislawa Szymborska, and W. H. Auden to name a few.

I miss receiving poems from my grandfather, they were such beautiful gifts. So, I thought to myself (which is something I do quite often), why not send some instead? Perfect for my on going Flat Project, and to give to friends, just because you want to share a nice thing.

The poem I used, is one I saw at Dottie Angel's, (not that I was at her house, chatting about this and that and came upon the topic of poetry), but rather at her blog, which is where I spend my free time. I loved the poem, and decided to print some and embellish with a few things to send to my pen pals.

Here are some ideas:

 Pick your favorite paper, and poem. These papers were presents!!

Print and cut to appropriate size .

Roll and tie with nice ribbon. Eat some Cadbury Mini-Eggs while rolling (very important).

Sewn version. Printed on normal paper, and machine sewn onto felt.

Washi-tape version. Get your stickers, and scraps of paper to make a frame.

If you much rather find a surprise poem without having to print one, buy a ChocoLove, each bar comes with a poem!!
These are all flat friendly versions. Just add a letter to your friend explaining why you love the poem so much. I'm sure your pen pal will love it! Who is your favorite poet?? Do you have a favorite poem??

Have an inspiring weekend. Read poems. Send poems. Love poems!!!
Giova

Monday, March 4, 2013

Felt Envelopes

This is a nice and simple idea that won't take a lot of your time doing. I just thought it was nice idea to instead of sending my pen pals some nice postcards that I've encountered in a simple paper envelope, instead make one that they'll keep and re-use. 


What I used for this project:
  • 2 pieces of felt - the thin kind, cut in the size of a postcard
  • thread and needle - although I did use my sewing machine for some bits, you could do it without one
  • stamps, ribbons, fabric piece - things you might want to use to adorn the front of the envelope


The back of the envelope, simply stitched like a paper envelope.

Then I embroidered a neon (I'm obsessed with neon things)  heart to "seal" the envelope, stamped a ribbon with the words air mail, stitched a paper stamp and embroidered my friend's name.

The one that says to Megan is stamped on paper then sown on to the felt, and I added an extra stamp, which looks nicer, but I had already sown together the one for Puk, so that one only has one stamp.

Close all sides except for the top one, where the postcards will go in. That is basically it. You can add or take things, just don't forget to put this in a paper envelope to send to the destination, otherwise I don't think it will get very far.

It is light, the size of a postcard, and very, very, flat!!!

Have fun, and happy Monday!
Giova

Sunday, February 24, 2013

Handmade Sachets

My brain is in snail mail mode (almost all of the time). You might have seen an envelope to the right of the blog that says; "The Flat Project"and for that reason I have been thinking, and trying to realize all of these  "flat ideas." So beware, more are coming. 


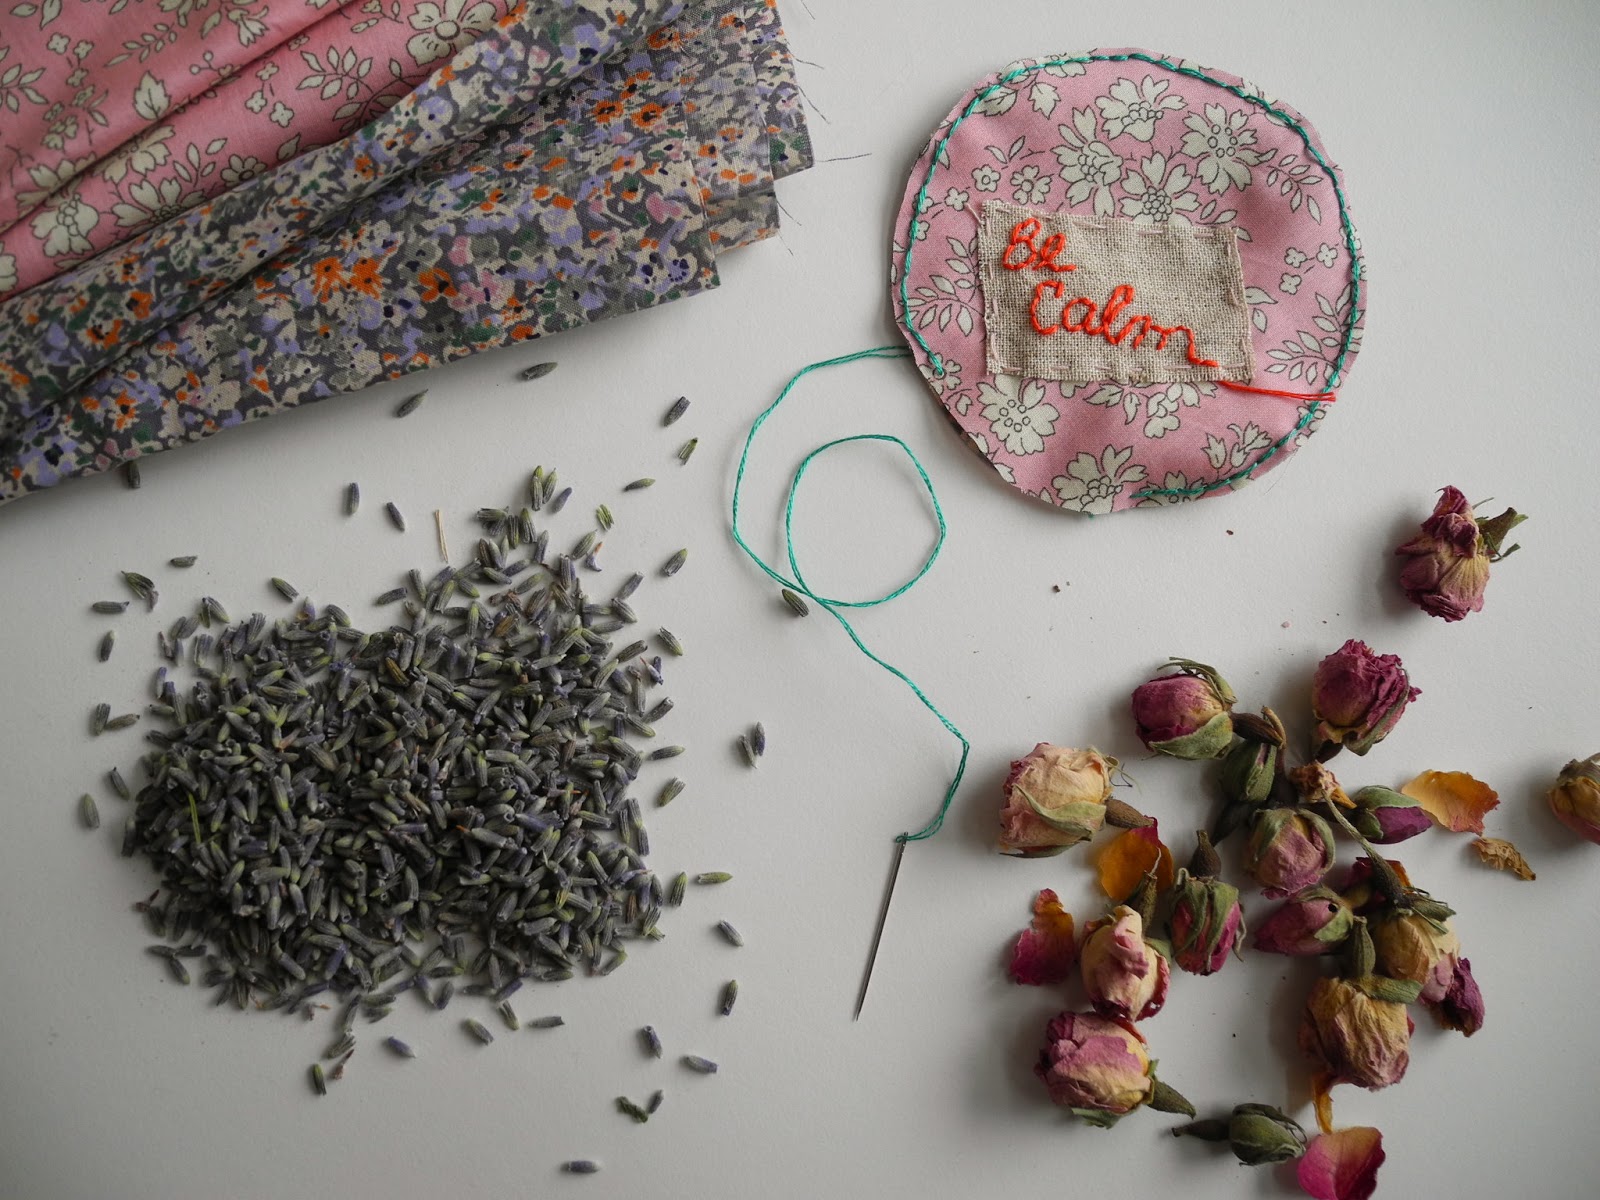
I thought of these sachets because I have a pen pal that is very scent sensitive, they're so small the smell is not overwhelming, and they make cute gifts. This is what you'll need:
  • Fabrics - mine are from Liberty and Petit Pan, for the embroidered part any remnant piece will do
  • Thread, in your preferred colors
  • Dried lavender, and dried rose petals - mine are from Jacob Hooy
  • Scissors
Cut a circle on a piece of paper, this one measures 8 cms. Trace it onto the fabric, and cut two circles.

Embroider your favorite words. The fabric is pretty enough to leave it with no embroidery, if you choose to skip this part.

Stitch the two circles together, leaving an opening for the fragrant lavender or roses.

Fill the pouch with the dried lavender, try not to over fill, otherwise it won't be flat. 

Finishing stitching the circle

And it is now ready to be mailed.

Happy Sunday! Happy mailings!
Giova.
Related Posts Plugin for WordPress, Blogger...