Showing posts with label snail mail gift. Show all posts

Monday, September 15, 2014

How to make a scraps of fabrics garland

I think it is not a secret that I absolutely love garlands (in fact I'm a bit obsessed with them, always have), and I really like coming up with new ideas to make them.

Recently I've been thinking about a present I needed to make and thought of this garland which I'm sharing with you today (a garland born out of necessity). I'm also selling them on my Etsy shop just in case you don't feel like making any. (wink, wink).

Either way, I would also like to touch (lightly) on a subject that I find a bit frustrating; I don't mind a bit sharing my ideas, also that you make these or the other things that I've made for the blog to share with friends or family, is the reason why I share my ideas in the first place. But from this to actually find someone selling the exact same things on Etsy is quite annoying, frustrating, maddening … In the end people will do whatever they want, and I think this is a battle I will never win. I just needed to get  that out of my chest (sort of)!! ok, pheewww!!!

These are quite easy to make once you decide on the fabrics and colors you'll choose, which is always the hardest part for me.

What you'll need:

  • 7 pieces of fabric
  • 2 ribbons or lace
  • 1 piece of thick thread
  • button, safety pin and charm
  • threads in your favorite colors - I used 2 different ones per garland
  • a favorite word, and some glue

How to:

-Cut a 65 cms piece of thread and start from the lower part.
-Attach a charm so it gives weight to the string.
-Embroider the first piece of fabric directly to the piece of thread so it won't allow any sliding or
 moving. Each piece of fabric measures 1x1 or 1x2 cms (aprox).
-Glue your favorite word to the first piece.
-Leave between 3 or 4 cms of space between each piece.
-I embroidered a word on the next piece, but you can omit this part
-Then add a piece of lace
-Followed by another piece of fabric, then 2 bias bindings, then a ribbon, and 2 other pieces of fabric
- I attached a button and a safety pin
-The final piece is a piece of old paper with a type written word

There is not a right or wrong way of doing this, which ever way you prefer to place or add things, will look great (I think). I simply followed the same pattern in all the garlands as I didn't want to think too much.

So what do you think? Do you think my friend will like the one I made for her? I surely hope so.

These end up being really light and would be perfect as snail  mail gifts. Even if I say so myself, I think they are quite happy garlands.

I wish you a very creative week ahead,
Giova

Monday, March 31, 2014

A handmade quote book

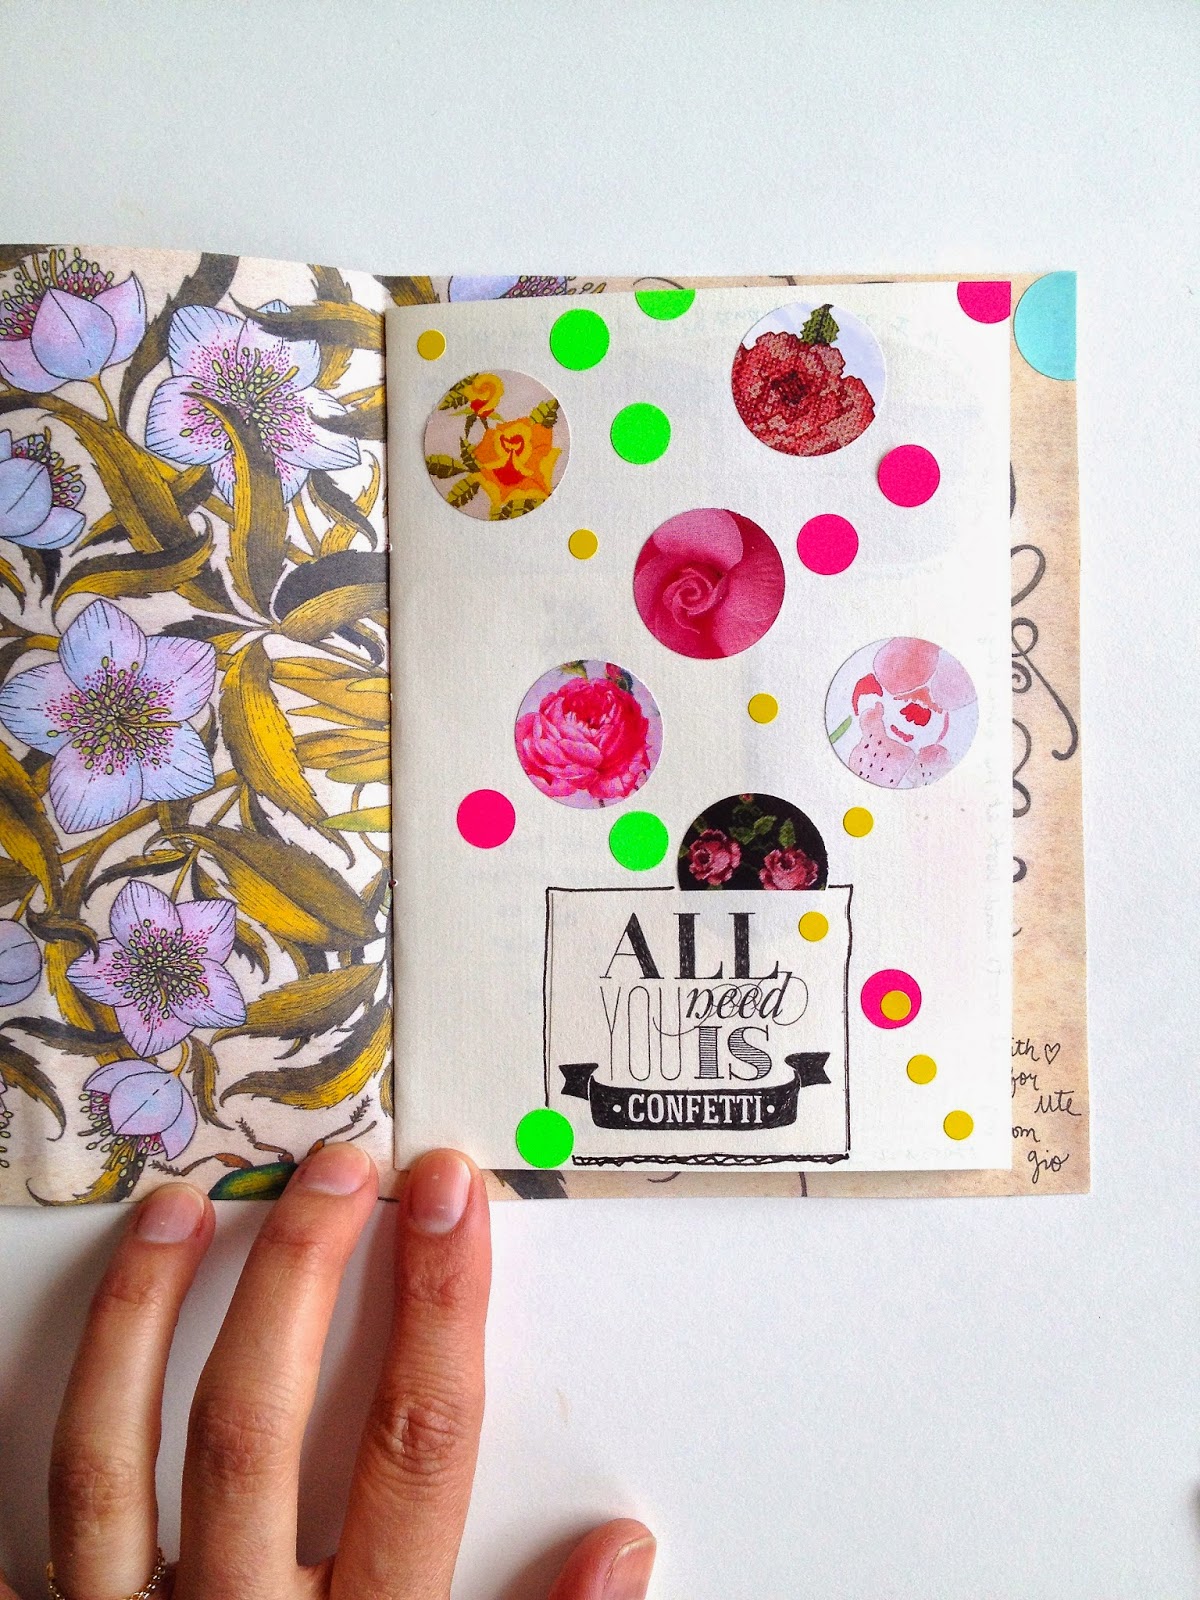
This week it is my sister's art show opening. I was supposed to be there in our hometown for this event, but unfortunately  I wasn't able to make it. So with my guilty feelings and the fact that I wanted to make it up and also reassure her that everything would turn out great, I decided to make her a little book.


For some reason (I don't know which), I was not going to show this little book here on the blog (so excuse the really poor quality of the pictures). Since I made this book for her, I have started making others, and found them quite addictive, that is why I decided to share them with you. 

All you need is love and well... paper, glue, and scissors, and a needle and thread to tie the whole thing together.  The quotes I found on Flow magazine, but you can just write them yourself.

For my sister's book I used mostly encouraging quotes, or ones that had to do with artists. And of course a picture of my kids (that was a no brainer).

 Just make it personal, and I'm sure the recipient will be as happy as you making it.

You can add as many pages as you like, mine are 2 pages folded, which makes 8 pages to decorate, which I found was the perfect amount. 

I hope you are inspired by this idea and decide to make some of your own.

The video from the top comes from my instagram, if you like to take a better look.

Have a great start of the week.
Giova

Monday, February 24, 2014

Handmade and small gifts for pen pals

"Spring is approaching," is my new mantra. I repeat this in my head all day long. In fact I've been thinking about it since the beginning of January which makes me a bit, how do I say this? Annoyed? I'm supposed to be in the present, the now, enjoying what I got right at this second and I'm dreaming of a beach, a hammock and lots of sun. Oh! I've just realized that it is summer what I'm dreaming about.

Anyway, here are some ideas to cheer someone up via snail mail. The most important thing is that it's flat! I haven't had the chance to complain here about the raise of postal prices (boy are they ridiculous!).  The fact that a simple package is starting at 9 euros makes me think twice before I send anything out.

So in January (I know...) I came up with some little boxes to send. This one is filled with airmail labels that I printed here. But some stores like this one, sell vintage ones.

You can also make little pouches to fill with your favorite seeds, carve a stamp, make a label and close with your favorite washi-tape. Spring is approaching, spring is approaching...

Send them in a small tin box. Don't forget to include the instructions for planting.

Why not carve a few tiny rubber stamps to fill a pill box? As you can see I was still in heart and Valentine's mode.

Send to friends, pen pals, any one really. Snail mail has the ability of cheering everyone up, and with this winter going on, wouldn't it be nice to open a package that has been sent with lots of love? I think it would!

The things you could fit in a small box are a lot. Just give it a try. Did I mention cheer someone up?

Happy monday. I hope it is a good one!
Giova

Wednesday, October 23, 2013

Surprise Packages

It has been a while since I last posted about one of my favorite things; packages. This time I just couldn't pass the opportunity to show you what arrived at my door.

Remember a week or so that I showed you the heart I was making? It was for a swap that I was doing with the very inspiring and talented Mary Stanley.

I've been wanting a rug hooked heart for such a long time, to add to my heart collection. I was very nervous with mine, as I had never made a heart before, but it seemed like a good thing to make. A heart for a heart. I hope she likes mine as much as I did hers. I actually did a little dance when these arrived!

If you follow me on Instagram you probably saw when these arrived. My friend Ute Veya had made the loveliest package. I was so in love with everything that I needed to show it to you as well.

This "mini autumn memory bunting," as she called it, is just perfect, don't you agree?


I love surprise packages, I've said this many times before. But there is one thing that I love the most; the love and dedication that goes into a handmade piece and especially when it has been made just for you, is just... WOW!

Did I get that right? Sometimes the english language just doesn't cooperate with me.

I hope you like my treasures as much as I have.

Have a great day.
Giova

Wednesday, October 16, 2013

DIY - Make Coasters With Fall Leaves

I was seriously thinking about not doing any crafts with leaves. Guess what? I just couldn't keep myself from not doing one.

I mean, have you looked out of your window and seen all those amazing leaves just turning bright and making a beautiful mess of yellow? My sister would probably answer no to this question, but she does live in Miami after all.


I went in a fabric store this past monday and when I saw this wool/tweed stuff, I thought; "Wouldn't that make a nice leaf?"


This is what you'll need:

  • fabric for the leaves, for the front and back part
  • thin felt for the middle
  • leaves that you've picked up on your walks, they are free!!
  • thread, needle, pins, scissors
  • pencil and paper
Trace your chosen leaf. Cut the template. Pin it to your fabric of choice. Cut the leaf, and stitch to the top fabric.

Cut the felt and back fabric to fit your front. Iron the back fabric to cover the felt, and then stitch the coaster using any stitch you like. I used the blanket stitch and back stitch. For really amazing sources on stitches go here or here.

Then just marvel at your hard work (ahem!) and don't forget to include one on your next letter to your pen pal. Maybe add a tea bag or two?

Or maybe just give them all to a friend who invited you to their house for dinner? OK, you get my drift. Just make some and give it away, because handmade presents are the best, don't you agree?

Have a great day and as Dottie Angel says;"Do feel a little crafty at least twice a day."
Giova

Friday, September 20, 2013

DIY - 6 Paper crafts using old books

Now with old books in my house I've been crafting like a mad woman. This little card, was given to me by Julie at the end of the workshop. It is the one to blame, for it has unleashed an "old book rampage."

She used a really beautiful rubber stamp she had made, and just added a string to tie it.

Lets start with some pretty flowers.  How about a bouquet of neon flowers? Perfect to tuck in with your letters, or to add on top of your presents.

As if my house needed more buntings!  I like how the neon color looks against the old paper. The string is just a bunch of scraps and selvedge tied together.

Strings are really my favorite thing to make. I used some hole punchers, and  I just drew the other pieces. And then to give it a bit of weight I added a few buttons.

I left this one simple, but I really want to make one with a lot of rubber stamps printed on the  paper.

Is never too early to start thinking about the Christmas card you'll send to your friends, or is it??

I bought this note pad at the supermarket, ugly cover, nothing special. Now I think it is pretty darn cute.

Simply cover with an old page that has a nice illustration. Then use your favorite washi- tape, and rubber stamps.

And well... you know me. I had to make some envelopes using the paper. I wouldn't feel "complete" if I hadn't made some.

I'm glad I'm putting the pages of those old books to good use. I'm also glad I discovered that crafts using old books are really incredible because not much is needed. The whole beauty is in the old page (is that corny enough?).

Okeydokey, this is it! I promise I won't be covering lamps or tables with the paper. Or that next week there will be a post with 10 "new" ideas for old book pages.

Have fun and a happy weekend!
Giova.

Monday, September 16, 2013

DIY Craft using old book pages ... File folder

First of all let me get one thing straight; I'm not a destroyer of books. Or wasn't until last week in France, when we were required by our teacher Jessie Chorley to bring an old book with the intention of creating a box out of it. I actually didn't make mine, because the books I had bought were too thin.

Second, let me also say, that I didn't own any old books (also until last week). As you might know, I've moved quite a lot, and what used to be an incredible book collection is now down to a "very few."

This is the first time I've used old books for crafting. I think it had to do with my upbringing. Books were precious objects, meant to be read, and after that returned to their place in the shelf.

Now my reasoning is this: What am I supposed to do with an 1883 Nature and Science book in French??

I needed a place to put some scrap reliefs that I'm sending, and I thought of those Japanese plastic file folders, which I love and find very useful.

So with that idea in my mind, I went on to use some of the pages from the books.

 I've sewn the two pages together (the left and lower part), and then added a small decoration.

For my friend who's name starts with the letter "P," I've colored the front page and also added a piece of fabric to the left side.

And for my sister who loves maps, I've added a pastel ribbon and used a piece of washi-tape, and a rubber stamp. The washi-tape had to make an appearance otherwise it just wouldn't be me!


I had no idea destroying books was so much fun, and now they can be appreciated differently. So hooray for new uses of old things!! My mind is now much happier thinking that I've just recycled some old paper.

Get crafting and have a wonderful week!
Giova

Friday, August 23, 2013

A String of Shells

We have been back in Holland for more than 2 weeks already, and every time we see the sun shinning (which is not very often), we jump in the car and go to the not very popular beach.

One of my favorite pastimes is gathering shells, and then putting them on a strings (I love strings of things). A very easy craft and one that I'm sure your recipient would love. I'm not including this in my flat project as it exceeds the dimensions. But it is something I would definitely include in a package for a pen pal.

What you'll need:

  • shells - especially watch out for the ones with holes otherwise this won't be an easy craft
  • thread in your favorite color, and needle
  • tassels, pieces of fabric, anything that you want to add to your string
  • origami paper for the box

Then just string the shells how you want them. Adding pieces of fabric, or beads along the way. I always start mine from the bottom part.

Have fun putting it together. There is really no right way or wrong way to do this.

I really think that this string makes for a really nice gift. Or at least it is something that I would love to receive.

Then make a little "Masu" box with your origami paper. This box was made by my son, and he used the scissors for a part, which I'm almost certain in origami you don't use them. You can find instructions here and here.

I hope you will be inspired to make your own little string, and to share with friends the nice shells you picked this summer.

The shells I pick usually go in a small glass bottle with a label of the name of the beach. How do you keep your shells or the things you gather from nature? Is there a especial way you keep them?

Have a wonderful weekend and if you go to a beach keep this string in mind!
Giova.

PS: I leave today for Copenhaguen (haven't been there since I was 18). I'm helping with a project, and they were willing to pay for my travel expenses (so if you know me, you know I can't keep myself out of an airplane for too long). I hope to instagram the bejesus out of that amazing city.

Friday, July 12, 2013

Nesting Envelopes

What is better than receiving an envelope in the mail?? Well, receiving lots of envelopes!! I was thinking of the Matryoshka or nesting dolls and how they fill perfectly inside of each other. And then of course my brain went into envelope mode. I already had the biggest and the littlest one, so I went from there.
I made a total of 8 envelopes the smallest with the heart  is from Nouveau Nancy. You can make as many as you would like, but I think the more the merrier. Just imagine the face of your pen pal when she opens envelope after envelope, and that will be enough to make you carry on.

envelopes

There are many ways to make an envelope, but here is one I did a while back. Just make sure to paste a piece of writing paper inside each envelope so that you write your letter on the actual envelope and not add extra layers, besides I think it will be too confusing.


Making envelopes is quite relaxing and fun (at least for me). I can see my sister's face right now and going hahaha. Maybe I'll send her these so I can slowly convert her into an addict letter writer.


 Don't they look super cute all nestled like that? For more snail mailing ideas make sure to check the Flat Project.


This weekend we are driving down to Italy with some pit stops along the way. It is only 12 hours total, but with kids in tow it can feel like a million. Finally we get to experience what a real summer is, and not these 2 warm days that we got at the beginning of the week.
I still have some posts prepared for the next week so this is not a goodbye, yet!

Wishing you a great weekend, and hope to see you next week!
Giova

Monday, June 17, 2013

Washi-Tape Alphabet

The idea for this post started a month ago, before my trip to Berlin. It was only meant to be a P and an H. Then 2 weeks ago I thought; "wouldn't it be nice a whole washi-tape alphabet?" It ended up looking pretty nice (or so I thought), but then something happened, something that occurs in the immensity or smallness of our world. This past week I saw that Creature Comforts had made something very similar, and I went gulp, and also said some words in the vicinity of "holy cannoli!!"
Hers (like all the things she does) is beautiful, has a downloadable alphabet and they are stickers (why didn't I come up with that idea?).
In any case, I was thinking of what to put inside an envelope to send to my pen pal, and this is how this very brilliant idea, never done before in the world of washi-tape (add very cynic tone here), was born.


This is what you'll need:


  • A favorite font printed (this is arial bold, 300 size)
  • cardboard
  • scissors or X-acto knife
  • all the washi-tape you can find


  • Cover the letters with the washi-tape, and then simply cut the excess tape. I recommend just doing the letter you want, as the whole alphabet (I mean there are 26 letters, that is like a lot of time and lots of washi-tape, believe me).


    Beware, washi-tape can be very addictive. You have been warned!!

    Here are a few ideas of what to do with all those letters. Before sending your friend her initial, write all the words you come up with that start with that letter (I know a bit childish, but we pen pals like all childish stuff, or maybe it is just me?). As a bookmark, for your mood board, or for the wall, where my G is now looking all good and great!!

    Have a most excellent monday, if it is turning a bit blah, just take out the washi-tape and have fun!

    Giova.

    Related Posts Plugin for WordPress, Blogger...