Showing posts with label handmade Christmas gifts. Show all posts

Monday, November 24, 2014

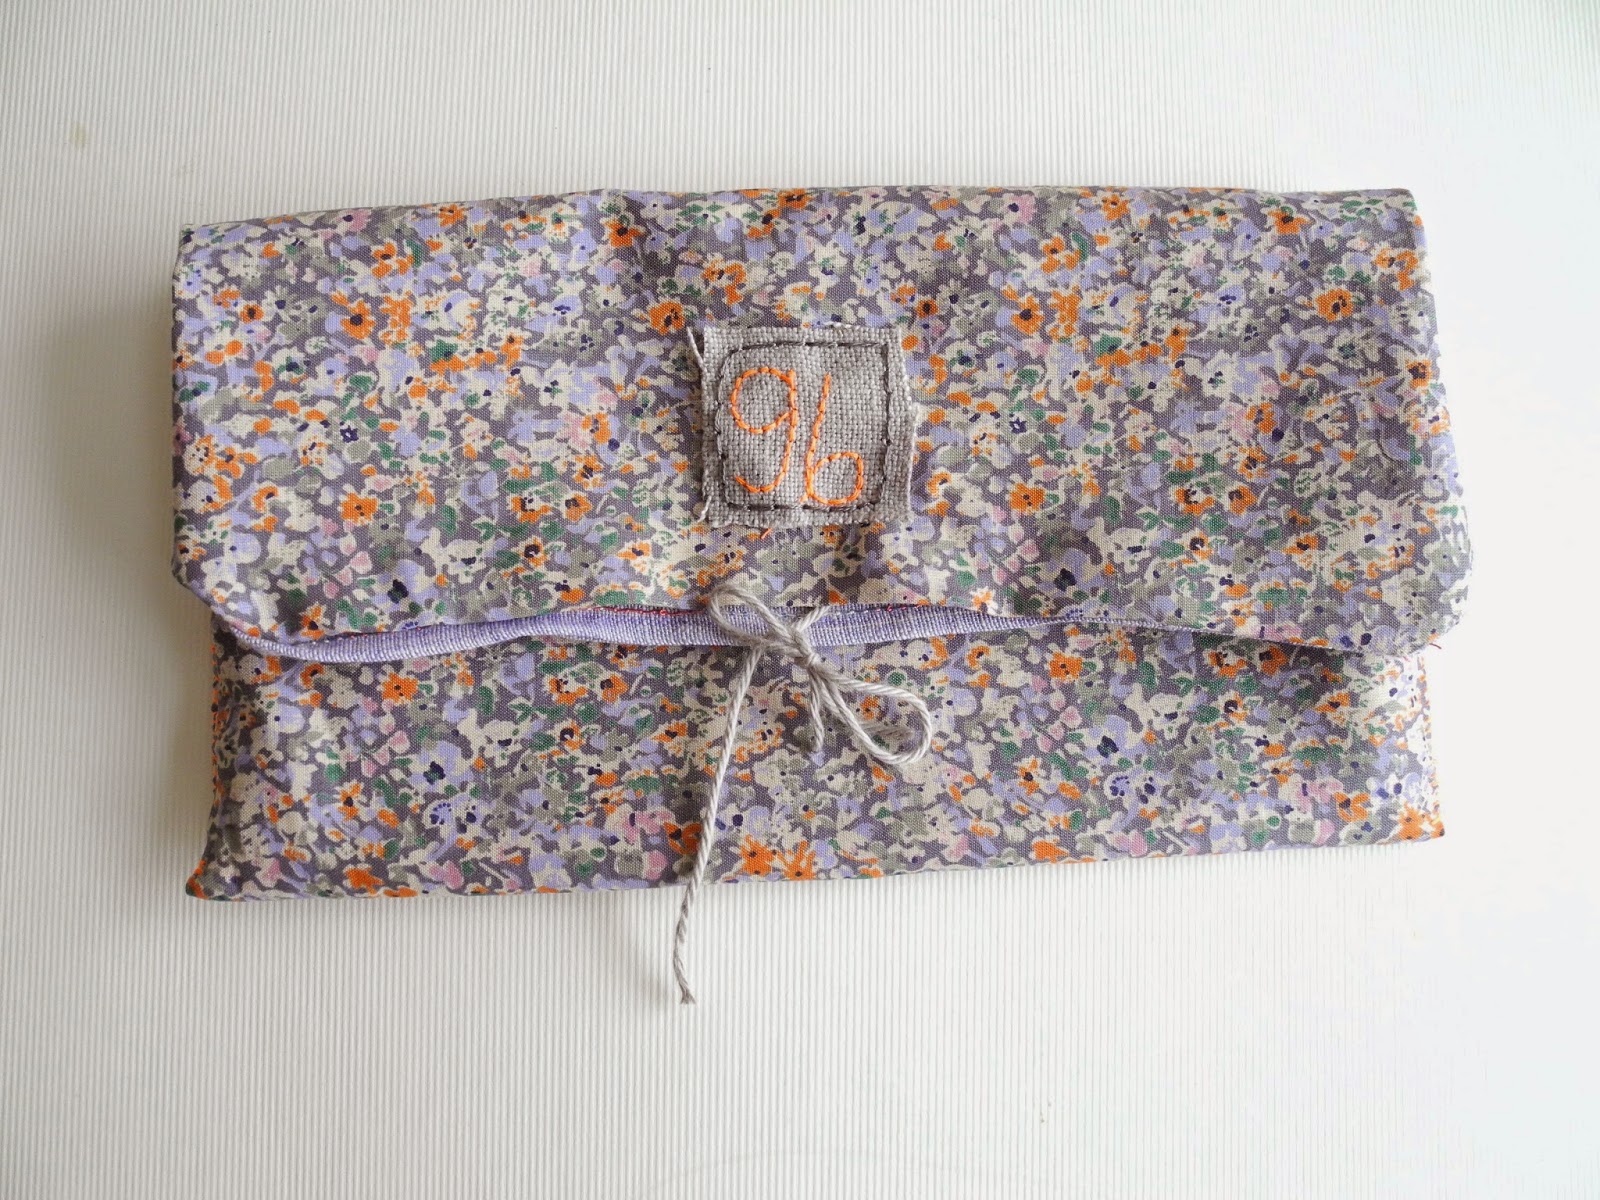
A very easy to make fabric pouch, clutch

I love pouches, all colors, sizes and textures. I use them for all sorts of things. There is one filled with old ribbons, another with new, one keeps crochet needles, another holds my traveling "things." This one here is my favorite because it is very easy to make and  it is not heavy at all (empty, that is).

 What you'll need:

  • fabric
  • thread and needle
  • scissors
  • sewing machine just makes this project super quick

- Cut 2 pieces of fabric about 24 x 33 cms
- Sew seams on both pieces 2 cms more or less- they should be 22 x 31 cms now
- Sew them together, the nice part of the fabric should be facing each other, I just mention this silly information because I forgot to do this on the red one!

- Leave 8 cms or so without sewing at the top, turn it inside out
- Iron, it makes the next step much easier

- Fold the lower part about 8.5 cms as to make a pouch
- This part I did by hand. Just grab a bright thread (if you feel like it) and sew both parts together as shown
- Sew the 8cms on the top part of the pouch.
- You can add strings before or after that step, it is up to you
- I added one string that goes around to the blue one, and 2 strings that tie together to the grey

- I added a piece of hearts fabric on one, and embroidered my initial on the other one, to add an extra touch of niceness!
- The pouch/clutch measures 20 x 11 more or less, I say more or less because I really don't measure anything, only for this project I had to keep track of the measurements
- Keep them to yourself or give them away!

 Fill the with:

  • pens, pencils
  • crochet needles
  • nib holders
  • threads
  • make-up
  • travel essentials


This is another very easy project that you can make in no time. Seriously, if you have a sewing machine it shouldn't take you more than 20 minutes to do it. Including the sewing by hand part!

Just one more week until December, are you ready??
I've been trying to get things ready, but I'm such a procrastinator that things only hit me when it is too late.

I hope your week is sunny and beautiful,
Giova

Thursday, November 20, 2014

Handmade friendship bracelet

It was so grey yesterday I thought I was not going to be able to take any pictures. Fortunately I found out, there is some sort of light in our tiny balcony. Unfortunately I almost freeze into unconsciousness. Just kidding, but sort of ;) You can get a Colombian out of their country, but you can never get the warm weather out of their soul!

I've already made similar bracelets to sell before, and now I have these ones ready on the Etsy shop. I thought it was a good idea to offer gifts for 10 and under, don't you agree?  So you can look these up and also the handmade notebooks I made here.

I also wanted to share the idea with you here. Traditionally, friendship bracelets are weaved, but as I don't have much time lately I decided to take a big short cut.

Maybe you have some lovely fabric lying around waiting for the perfect moment? Or maybe you have some cute buttons or charms you have been collecting for ages? Whatever the case, I think you might find some inspiration from these bracelets. ** As always do make them for your friends and family, but please respect my idea, thank you!

This above is just an idea of what you might need, but I think it all narrows down to your own personal taste, and also what you have at hand. The beautiful wrapped cotton was purchased here.

There is no wrong or right way of making these bracelets. I just wanted to share them with you as I'm an avid promoter of the handmade gift. I always think this kind of gift is so much nicer than anything mass produced. Anything that you can make with your hands is always filled with love, no matter what it is.

Wishing you a great weekend ahead, may it be filled with nice walks, lots of tea and some crafty time!
Giova.

Monday, November 10, 2014

DIY- Handmade coasters using scraps of fabrics

To continue with the idea of handmade presents that can be personalized, easy to make, that don't break your budget (or mine for that matter) and just in time for Christmas, I decided to make some coasters using fabric scraps.

I love coasters, and use them for almost everything. To put little flower pots, trays with trinkets, and even candles, and the best part is I can change them depending on whatever color mood I'm in.

Lately I'm into blues (also the music genre) but fabrics in this case;  beautiful indigos, navy blue, denim blue and the color of a bright and sunny day, with a splash of red.


 What you'll need:

  • fabric scraps in your preferred color/colors
  • bigger piece of fabric for the back
  • needle and thread
  • scissors
  • sewing machine optional (I used mine to make these), but you can also do it by hand. I made last year's coasters by hand.


1. Cut out 5 or 6 pieces depending on the size you want your coasters to be. The four I made are all different sizes, but the coasters range 10x7.5cms for the smallest one (which is the one with the letter "G" embroidered) and 10.5x8.5cms for the biggest one (which is the one with the red stitches).

2. Arrange them how you want, and also whether you want a square or rectangle

3. Sew them together. By this point you are probably thinking no way, too much! But since the squares are so little, it really doesn't take that much time. The pieces of fabric are more or less 4x5cms.

4. I first made the top part and when I was done I cut out the piece of fabric for the back. I used the same fabric for all 4, but only because I had leftover fabric from another project, but you can use different ones if you like. 

5. Make the top and bottom part the same size and iron them (this helps a lot) and then sew them together.

6. I actually left the personalization for the end but you can always do that before putting the 2 pieces together. 

Even if you are sending 2 or 4, just make sure you make each one special. It doesn't take much time to add a few stitches, embroider an initial or a word. I think it does make the gift more special.

The other nice side to this present is that it is flat and doesn't weight at all, so you can send it via post with no problems. For more "flat ideas" go here.

Just a little reminder that there is a really nice (ahem) giveaway going on and there is still time to join!

Wishing you a crafty week ahead,
Giova.

Thursday, November 6, 2014

DIY- Handmade notebooks for watercolors or sketching

For the next few weeks I'll be sharing some crafty ideas that can be easily made and just in time for Christmas. I know my favorite presents are always handmade things (not the ones I mentioned on the giveaway), but really there is something so incredible about handmade things. The love, time and dedication that goes into a gift, makes it so much more valuable than anything store bought.

After visiting this mill, I knew this was bound to happen (pun intended). What else was I going to do with the lovely "zaansch bord" I bought there?

I recently made a little notebook of scraps of paper that I learned at this e-course, but actually I learned this very easy binding technique here. Igloo letterpress sells "make your own notebook kits" if you want things already cut out for you.


  What you'll need:

  • thick paper for the cover (obviously these were purchased at the paper mill)
  • a bookbinder's awl (if you have one)otherwise a thick needle will do. My awl is a little one and  apparently for children, I can't think why you would let children use these, as I actually pierced myself with it, and boy does it hurt
  • paper for sketching or watercolors (I got Canson's Montval 185gm)
  • x-acto knife or scissors to cut the paper
  • linen thread
  • thick needle
  • and things to decorate the cover such as rubber stamps, scraps of fabrics,beads, stamps, etc…)

First: Cut the paper in the desired size and fold . This instructions that follow are for 3 holes, but you can add as many holes as you like.

Top left to right: Make 3 holes with the awl, 3 cms apart, and insert needle on the first hole leaving a long piece of thread in the back (I like how the long strands look). Then insert needle on either hole bringing it to the back.

Lower left to right: Insert needle on last hole and then insert needle in the center hole. That way both strands end up together.

Tie a knot and then tie another knot, this time include the strand that goes from lower hole to upper hole, that way they're tied together.

Personalize the cover, that way you'll be adding an extra touch to the notebooks. For this one I made I rubber stamp and added some beads to the thread.

Have some beautiful stamps? Well sew them on to the cover. I used my sewing machine, but it can be sewn by hand.

Lately I'm a bit obsessed with scraps of fabric, and I think this indigo dyed piece, looks rather nice. You can always add the person's name or initials or a word to the cover, anything goes really, it just means taking the extra step.

I hope you like them and give them a go. They are really easy to make, and I'm sure the recipient would be delighted, I know I would be.

As I mentioned on the giveaway there was a present missing. This is it! One of these notebooks (winner gets to pick which one) will be included. I hope you decide to join in, all you need is to answer my question here on the blog or on the Facebook page.

Have a fantastic and very crafty weekend, and see you monday for another handmade gift idea!!
Giova.
P.S: These will be included in The Flat Project as they are perfect for sending via mail. Light and flat (just my type).


Related Posts Plugin for WordPress, Blogger...