I have always believed in the perfect timing of things and how they find their way to you. These parcels below are amazing examples of excellent timing. They arrived in time to cheer, comfort, reassure and most of all to deliver the love the person invisibly wrapped just for me.
My life has felt a bit like a roller coaster lately, and these beautiful and amazing people from far away have made me feel loved, and for that I am deeply grateful.
It is magical how "pen-palships" are born, why some are a perfect match, and some others aren't, why some last many years and others don't. I've always thought it is actually quite similar to meeting someone in person- you either have the chemistry or you don't, and you either insist or you don't.
What I know for certain is, that when beautiful parcels like these or simple, long letters arrive on my mailbox, my life is so much fuller and brighter because of them... And I feel very darn lucky!!
Thank you so very much, Juliane, Jenni, Puk, Julia, and Jen!!
I wish you a beautiful weekend ahead and may the stars align so that beautiful parcels arrive at your doorstep,
Giova
Showing posts with label ideas for snail mailing. Show all posts
Thursday, May 14, 2015
Wednesday, June 4, 2014
Lavender bags with quotes for your letters
I combined the wonderful looking bags from Kusmi tea with the idea of the quotes from Yogi tea, and filled the bags with lavender, and voilà I nice little gift for your pen pals.
If you don't like the smell of lavender (you're a weirdo), no I'm kidding! Then try something like dried rose petals? Anything that will make your letter smell lovely, and who doesn't like a nice smelling letter?
I painted little pieces of paper with watercolors, wrote quotes I liked, and sew them to the bags. The fabric I used is gauzy like, forgive me as I have no idea the name of the fabric, but you can see it is quite thin.
I made these four in 10 minutes, including the time I spent unravelling the piece of fabric that my sewing machine had swallowed. You can also sew it by hand if you want or don't have a sewing machine.
These lavender sachets fit the dimensions for my flat project, just don't overfill the bags (wink).
I hope this inspires you to make some of your own, and send out nice smelling letters. Instead of quotes you can always write wishes or more personal messages, that is entirely up to you.
Wishing you a lovely and crafty day,
Giova
Monday, March 31, 2014
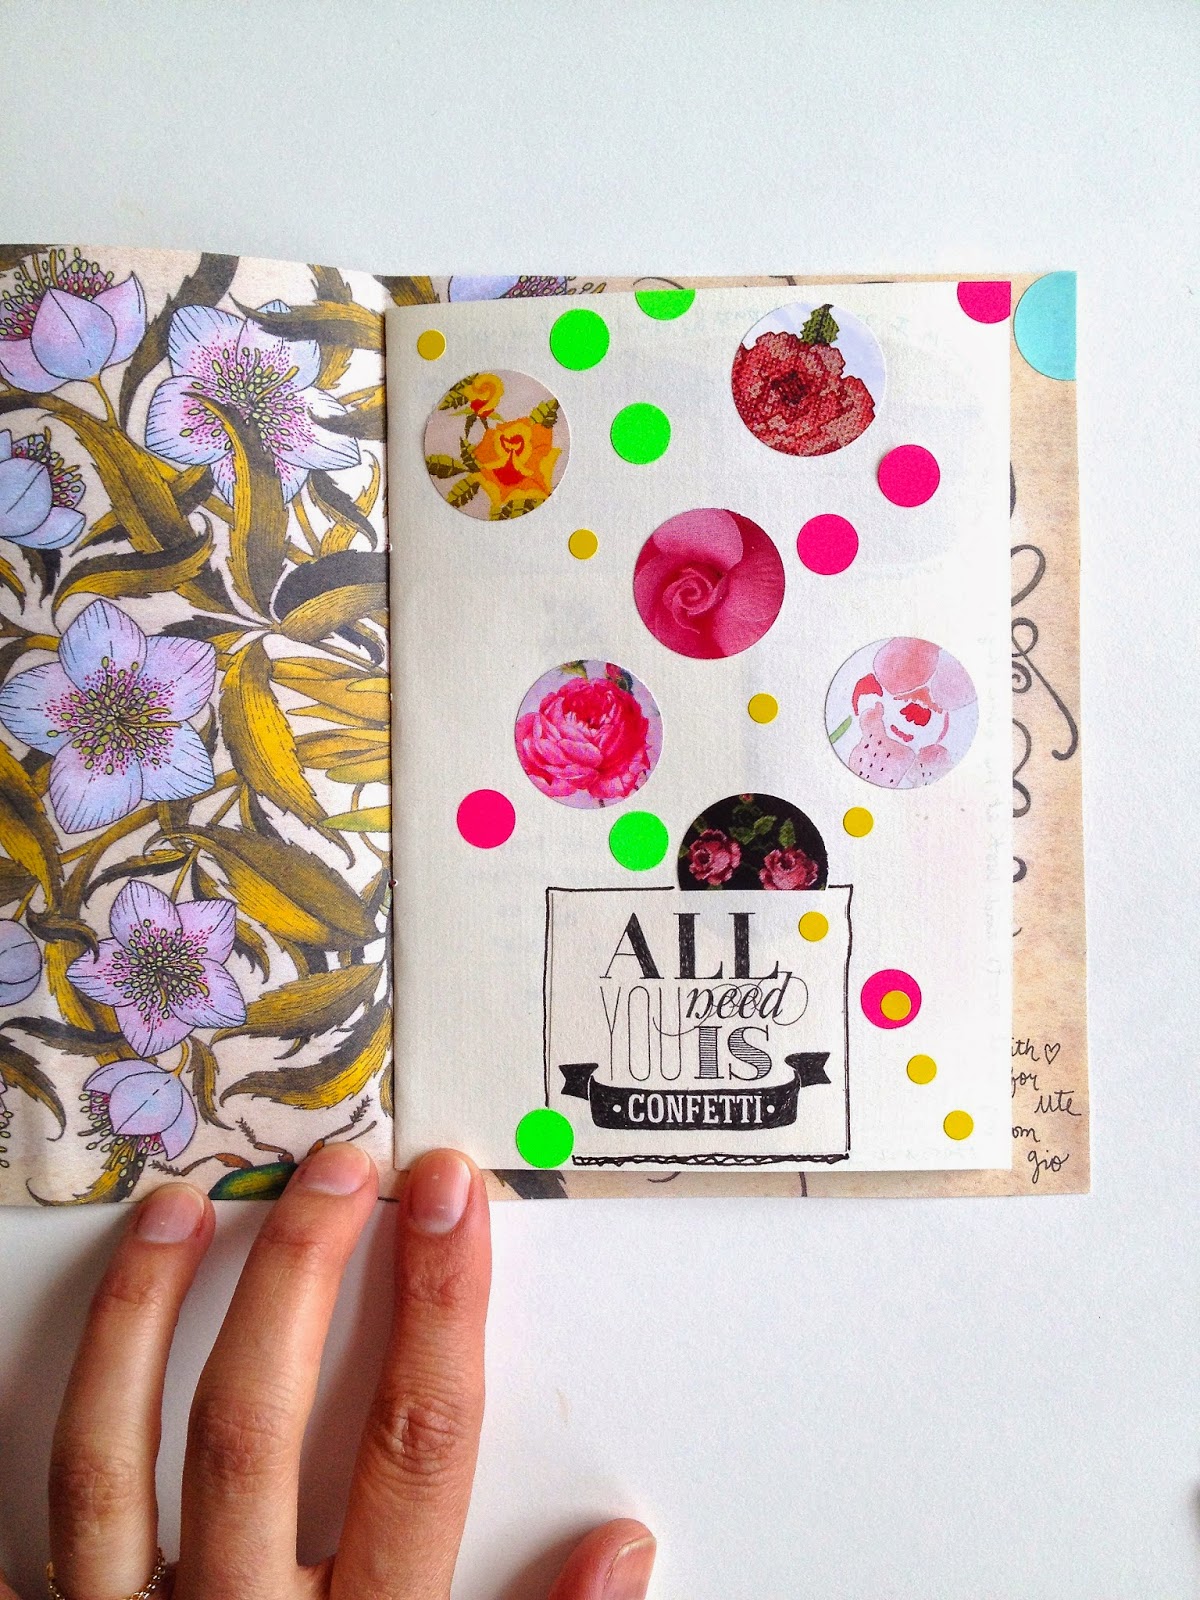
A handmade quote book
This week it is my sister's art show opening. I was supposed to be there in our hometown for this event, but unfortunately I wasn't able to make it. So with my guilty feelings and the fact that I wanted to make it up and also reassure her that everything would turn out great, I decided to make her a little book.
All you need is love and well... paper, glue, and scissors, and a needle and thread to tie the whole thing together. The quotes I found on Flow magazine, but you can just write them yourself.
For my sister's book I used mostly encouraging quotes, or ones that had to do with artists. And of course a picture of my kids (that was a no brainer).
Just make it personal, and I'm sure the recipient will be as happy as you making it.
For some reason (I don't know which), I was not going to show this little book here on the blog (so excuse the really poor quality of the pictures). Since I made this book for her, I have started making others, and found them quite addictive, that is why I decided to share them with you.
For my sister's book I used mostly encouraging quotes, or ones that had to do with artists. And of course a picture of my kids (that was a no brainer).
Just make it personal, and I'm sure the recipient will be as happy as you making it.
You can add as many pages as you like, mine are 2 pages folded, which makes 8 pages to decorate, which I found was the perfect amount.
I hope you are inspired by this idea and decide to make some of your own.
The video from the top comes from my instagram, if you like to take a better look.
Have a great start of the week.
Giova
Monday, March 17, 2014
Mail Art (attempts)
My obsession with envelopes goes quite far, as you can see here. They were mostly collages and always in the back of the envelope as I was afraid the post office wouldn't allow it in the front.
Apparently you are allowed to go crazy with your envelope (so I will see when these reach their destination). I have taken a clue from the stamps I recently got and went all out with my markers, which I haven't used in a while.
The envelopes are traveling at the moment so I'm not sure whether they made it or not.
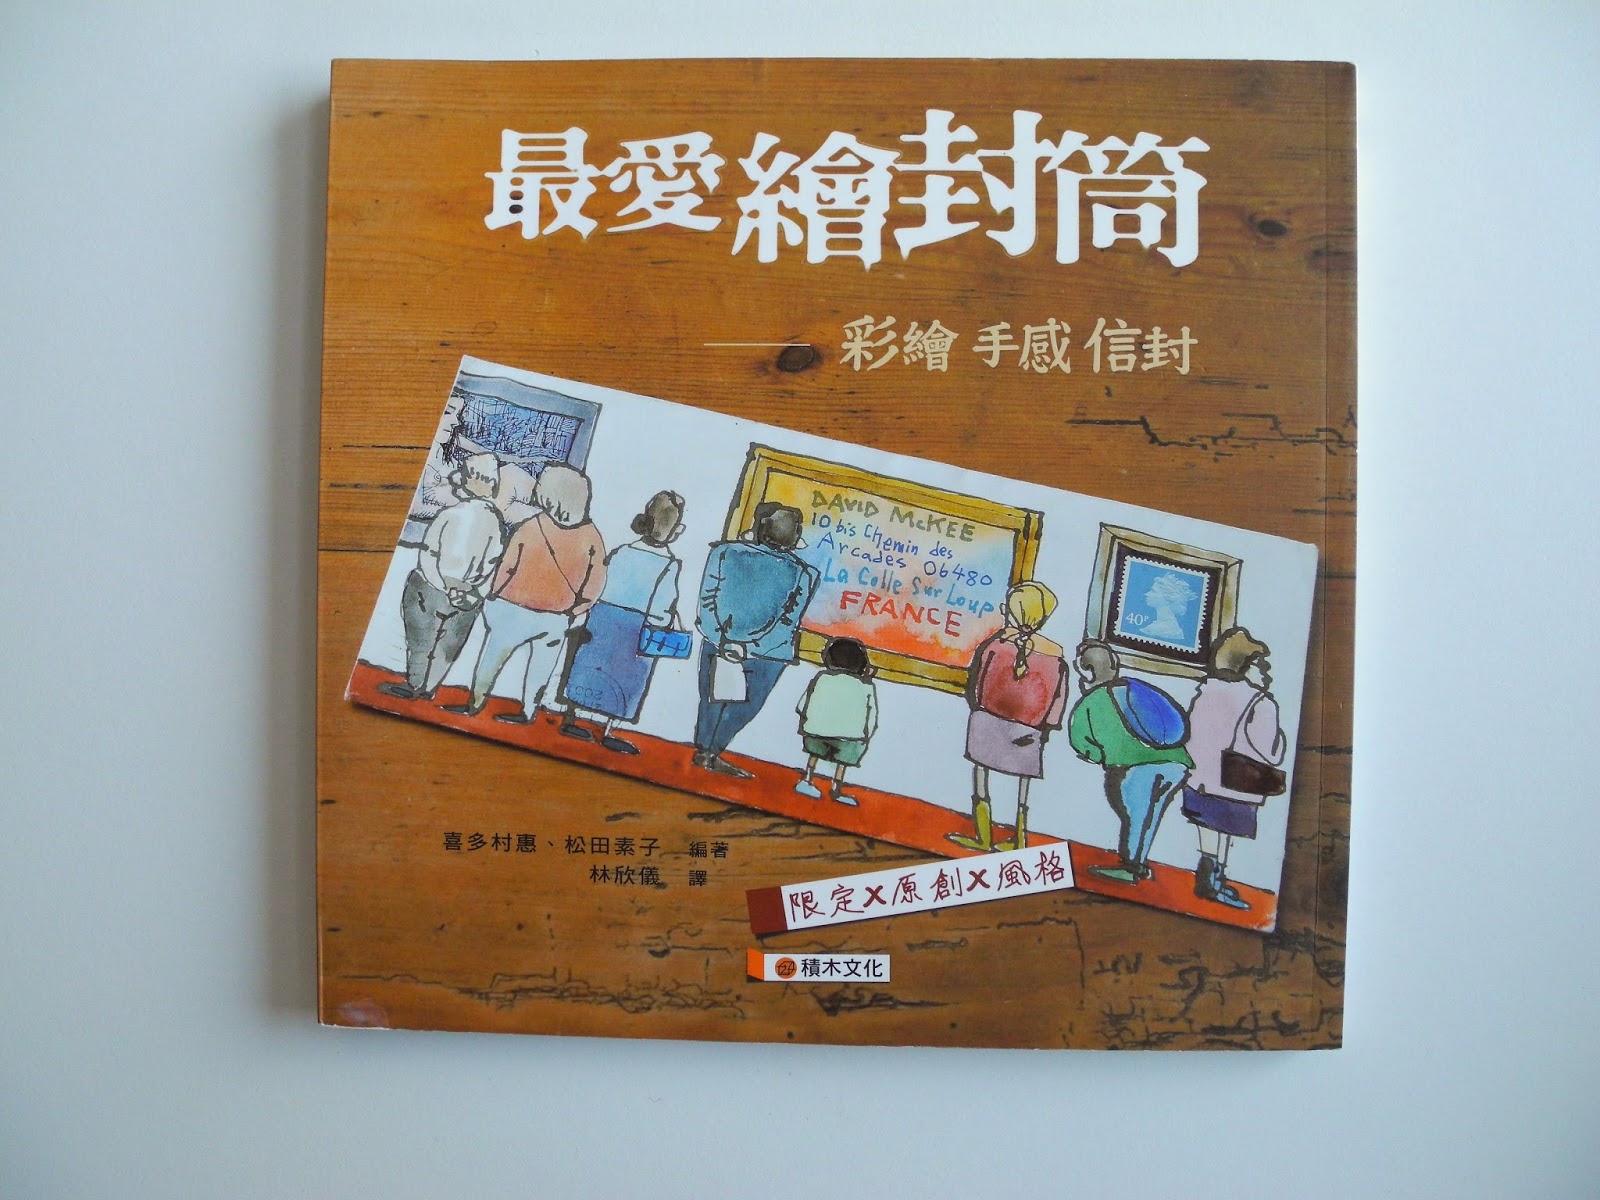
This Chinese edition of the Japanese book E Futo O Okuro by Satoshi Kitamura and Motoko Matsuda was purchased a while back here. It is such an incredible book to look at, obviously I have no idea what it says, but I don't need to. This book is Kitamura's collection of mail art, and the book below is Flugge's.
This one was bought on my trip to NY and I got it here. All the envelopes in this book were addressed to Klaus Flugge a publisher of children's books. It is a real treat because all the envelopes are from famous illustrators of children's books that worked for Andersen's Press.
Is mail art something that interests you?? Or you much rather focus on the content inside the envelope? I would love to hear your thoughts on this matter.
Have a lovely start of the week,
Giova
Apparently you are allowed to go crazy with your envelope (so I will see when these reach their destination). I have taken a clue from the stamps I recently got and went all out with my markers, which I haven't used in a while.
The envelopes are traveling at the moment so I'm not sure whether they made it or not.
This Chinese edition of the Japanese book E Futo O Okuro by Satoshi Kitamura and Motoko Matsuda was purchased a while back here. It is such an incredible book to look at, obviously I have no idea what it says, but I don't need to. This book is Kitamura's collection of mail art, and the book below is Flugge's.
This one was bought on my trip to NY and I got it here. All the envelopes in this book were addressed to Klaus Flugge a publisher of children's books. It is a real treat because all the envelopes are from famous illustrators of children's books that worked for Andersen's Press.
Is mail art something that interests you?? Or you much rather focus on the content inside the envelope? I would love to hear your thoughts on this matter.
Have a lovely start of the week,
Giova
Friday, September 20, 2013
DIY - 6 Paper crafts using old books
Now with old books in my house I've been crafting like a mad woman. This little card, was given to me by Julie at the end of the workshop. It is the one to blame, for it has unleashed an "old book rampage."
She used a really beautiful rubber stamp she had made, and just added a string to tie it.
Lets start with some pretty flowers. How about a bouquet of neon flowers? Perfect to tuck in with your letters, or to add on top of your presents.
As if my house needed more buntings! I like how the neon color looks against the old paper. The string is just a bunch of scraps and selvedge tied together.
Strings are really my favorite thing to make. I used some hole punchers, and I just drew the other pieces. And then to give it a bit of weight I added a few buttons.
I left this one simple, but I really want to make one with a lot of rubber stamps printed on the paper.
Is never too early to start thinking about the Christmas card you'll send to your friends, or is it??
I bought this note pad at the supermarket,ugly cover, nothing special. Now I think it is pretty darn cute.
Simply cover with an old page that has a nice illustration. Then use your favorite washi- tape, and rubber stamps.
And well... you know me. I had to make some envelopes using the paper. I wouldn't feel "complete" if I hadn't made some.
I'm glad I'm putting the pages of those old books to good use. I'm also glad I discovered that crafts using old books are really incredible because not much is needed. The whole beauty is in the old page (is that corny enough?).
Okeydokey, this is it! I promise I won't be covering lamps or tables with the paper. Or that next week there will be a post with 10 "new" ideas for old book pages.
Have fun and a happy weekend!
Giova.
She used a really beautiful rubber stamp she had made, and just added a string to tie it.
Lets start with some pretty flowers. How about a bouquet of neon flowers? Perfect to tuck in with your letters, or to add on top of your presents.
As if my house needed more buntings! I like how the neon color looks against the old paper. The string is just a bunch of scraps and selvedge tied together.
Strings are really my favorite thing to make. I used some hole punchers, and I just drew the other pieces. And then to give it a bit of weight I added a few buttons.
I left this one simple, but I really want to make one with a lot of rubber stamps printed on the paper.
Is never too early to start thinking about the Christmas card you'll send to your friends, or is it??
I bought this note pad at the supermarket,
Simply cover with an old page that has a nice illustration. Then use your favorite washi- tape, and rubber stamps.
And well... you know me. I had to make some envelopes using the paper. I wouldn't feel "complete" if I hadn't made some.
I'm glad I'm putting the pages of those old books to good use. I'm also glad I discovered that crafts using old books are really incredible because not much is needed. The whole beauty is in the old page (is that corny enough?).
Okeydokey, this is it! I promise I won't be covering lamps or tables with the paper. Or that next week there will be a post with 10 "new" ideas for old book pages.
Have fun and a happy weekend!
Giova.
Monday, September 16, 2013
DIY Craft using old book pages ... File folder
First of all let me get one thing straight; I'm not a destroyer of books. Or wasn't until last week in France, when we were required by our teacher Jessie Chorley to bring an old book with the intention of creating a box out of it. I actually didn't make mine, because the books I had bought were too thin.
Second, let me also say, that I didn't own any old books (also until last week). As you might know, I've moved quite a lot, and what used to be an incredible book collection is now down to a "very few."
This is the first time I've used old books for crafting. I think it had to do with my upbringing. Books were precious objects, meant to be read, and after that returned to their place in the shelf.
Now my reasoning is this: What am I supposed to do with an 1883 Nature and Science book in French??
I needed a place to put some scrap reliefs that I'm sending, and I thought of those Japanese plastic file folders, which I love and find very useful.
So with that idea in my mind, I went on to use some of the pages from the books.
I've sewn the two pages together (the left and lower part), and then added a small decoration.
For my friend who's name starts with the letter "P," I've colored the front page and also added a piece of fabric to the left side.
And for my sister who loves maps, I've added a pastel ribbon and used a piece of washi-tape, and a rubber stamp. The washi-tape had to make an appearance otherwise it just wouldn't be me!
I had no idea destroying books was so much fun, and now they can be appreciated differently. So hooray for new uses of old things!! My mind is now much happier thinking that I've just recycled some old paper.
Get crafting and have a wonderful week!
Giova
Second, let me also say, that I didn't own any old books (also until last week). As you might know, I've moved quite a lot, and what used to be an incredible book collection is now down to a "very few."
This is the first time I've used old books for crafting. I think it had to do with my upbringing. Books were precious objects, meant to be read, and after that returned to their place in the shelf.
Now my reasoning is this: What am I supposed to do with an 1883 Nature and Science book in French??
I needed a place to put some scrap reliefs that I'm sending, and I thought of those Japanese plastic file folders, which I love and find very useful.
So with that idea in my mind, I went on to use some of the pages from the books.
I've sewn the two pages together (the left and lower part), and then added a small decoration.
For my friend who's name starts with the letter "P," I've colored the front page and also added a piece of fabric to the left side.
And for my sister who loves maps, I've added a pastel ribbon and used a piece of washi-tape, and a rubber stamp. The washi-tape had to make an appearance otherwise it just wouldn't be me!
I had no idea destroying books was so much fun, and now they can be appreciated differently. So hooray for new uses of old things!! My mind is now much happier thinking that I've just recycled some old paper.
Get crafting and have a wonderful week!
Giova
Friday, July 12, 2013
Nesting Envelopes
What is better than receiving an envelope in the mail?? Well, receiving lots of envelopes!! I was thinking of the Matryoshka or nesting dolls and how they fill perfectly inside of each other. And then of course my brain went into envelope mode. I already had the biggest and the littlest one, so I went from there.
I made a total of 8 envelopes the smallest with the heart is from Nouveau Nancy. You can make as many as you would like, but I think the more the merrier. Just imagine the face of your pen pal when she opens envelope after envelope, and that will be enough to make you carry on.
There are many ways to make an envelope, but here is one I did a while back. Just make sure to paste a piece of writing paper inside each envelope so that you write your letter on the actual envelope and not add extra layers, besides I think it will be too confusing.
Making envelopes is quite relaxing and fun (at least for me). I can see my sister's face right now and going hahaha. Maybe I'll send her these so I can slowly convert her into an addict letter writer.
This weekend we are driving down to Italy with some pit stops along the way. It is only 12 hours total, but with kids in tow it can feel like a million. Finally we get to experience what a real summer is, and not these 2 warm days that we got at the beginning of the week.
I still have some posts prepared for the next week so this is not a goodbye, yet!
Wishing you a great weekend, and hope to see you next week!
Giova
Monday, June 17, 2013
Washi-Tape Alphabet
The idea for this post started a month ago, before my trip to Berlin. It was only meant to be a P and an H. Then 2 weeks ago I thought; "wouldn't it be nice a whole washi-tape alphabet?" It ended up looking pretty nice (or so I thought), but then something happened, something that occurs in the immensity or smallness of our world. This past week I saw that Creature Comforts had made something very similar, and I went gulp, and also said some words in the vicinity of "holy cannoli!!"
Hers (like all the things she does) is beautiful, has a downloadable alphabet and they are stickers (why didn't I come up with that idea?).
In any case, I was thinking of what to put inside an envelope to send to my pen pal, and this is how this very brilliant idea, never done before in the world of washi-tape (add very cynic tone here), was born.
This is what you'll need:
A favorite font printed (this is arial bold, 300 size)
cardboard
scissors or X-acto knife
all the washi-tape you can find
Hers (like all the things she does) is beautiful, has a downloadable alphabet and they are stickers (why didn't I come up with that idea?).
In any case, I was thinking of what to put inside an envelope to send to my pen pal, and this is how this very brilliant idea, never done before in the world of washi-tape (add very cynic tone here), was born.
This is what you'll need:
Cover the letters with the washi-tape, and then simply cut the excess tape. I recommend just doing the letter you want, as the whole alphabet (I mean there are 26 letters, that is like a lot of time and lots of washi-tape, believe me).
Beware, washi-tape can be very addictive. You have been warned!!
Here are a few ideas of what to do with all those letters. Before sending your friend her initial, write all the words you come up with that start with that letter (I know a bit childish, but we pen pals like all childish stuff, or maybe it is just me?). As a bookmark, for your mood board, or for the wall, where my G is now looking all good and great!!
Have a most excellent monday, if it is turning a bit blah, just take out the washi-tape and have fun!
Giova.
Friday, May 3, 2013
Guest Post: Jillian in Italy
I'm super happy to have Jillian from Jillian in Italy and her colorful world on the blog today. I'm an avid follower of her blog (and not only because we've been blogging friends) but because she is such an inspiration. She is a busy mother of 3, and always comes up with the most amazing projects or the best tips for traveling with kids. I'm really honored to have her here!
Hello One Bunting Away readers! I’m so happy to have been invited to share
this space today. I’ve been a huge fan
of this blog since I met Giova at The Hive last year and I adore her passion
for everything crafty and creative (we’re definitely kindred spirits). And I love Giova’s infectious enthusiasm for
anything to do with the old art of snail-mailing (can it be considered an old
art yet?). I’ve received snail-mail from
her and, believe me, it’s amazing. She
puts so much time and thought into her letters that leave you feeling so happy
and positive.
So when Giova asked me to do a little guest
post the first thing I thought about was to try and find something for her FlatProject (for snail mailing). And since
I’m a lover of sewing and fabrics it only made sense to combine the two. I decided to make my own notecards embellished
with sewn on pieces of fabric. It’s
quick and easy and actually a great project to do with kids of just about any
age.
This
is the perfect project to use up some of those tiny pieces of scrap fabric that
you’ve been saving for the last decade (please tell me I’m not the only one who
does this).
I cut up tiny circles, half circles and
triangles and sewed them around the edges of various sized pieces of coloured cardboard. I used a mix of floral, polka dot, gingham
and striped materials but it would also be really nice with solid fabrics as
well. And don’t worry about them being
perfect – the homemade look makes these little cards even more charming.
My daughters and I
also made some round cards which turned out very sweet. Definitely something a little different to
include in your snail mail envelope.
Since
I know Giova loves inspiring quotes I dug out my jar of alphabet stamps and
stamped some out on a few of the cards.
Whether you use these as
writing cards or frames for your favorite inspiring words I think they would
bring a lot of joy and colour to any letter you send to friends, family or
pen pals. Thanks for having me Giova!
I hope you have enjoyed her really cool ideas for making your snail mail a bit prettier and colorful. For more doses of color, sewing projects, baking goodies make sure to visit her blog.
Thank you so much Jillian! And do send a pretty card this way, I would love to have one!!
Have a great weekend!
Giova
Subscribe to:
Posts (Atom)